Useful tools
Apart from training/testing scripts, We provide lots of useful tools under the
tools/ directory.
Get the FLOPs and params (experimental)
We provide a script adapted from flops-counter.pytorch to compute the FLOPs and params of a given model.
python tools/get_flops.py ${CONFIG_FILE} [--shape ${INPUT_SHAPE}]
You will get the result like this.
==============================
Input shape: (3, 2048, 1024)
Flops: 1429.68 GMac
Params: 48.98 M
==============================
Note
This tool is still experimental and we do not guarantee that the number is correct. You may well use the result for simple comparisons, but double check it before you adopt it in technical reports or papers.
(1) FLOPs are related to the input shape while parameters are not. The default input shape is (1, 3, 1280, 800). (2) Some operators are not counted into FLOPs like GN and custom operators.
Publish a model
Before you upload a model to AWS, you may want to (1) convert model weights to CPU tensors, (2) delete the optimizer states and (3) compute the hash of the checkpoint file and append the hash id to the filename.
python tools/publish_model.py ${INPUT_FILENAME} ${OUTPUT_FILENAME}
E.g.,
python tools/publish_model.py work_dirs/pspnet/latest.pth psp_r50_hszhao_200ep.pth
The final output filename will be psp_r50_512x1024_40ki_cityscapes-{hash id}.pth.
Convert to ONNX (experimental)
We provide a script to convert model to ONNX format. The converted model could be visualized by tools like Netron. Besides, we also support comparing the output results between PyTorch and ONNX model.
python tools/pytorch2onnx.py \
    ${CONFIG_FILE} \
    --checkpoint ${CHECKPOINT_FILE} \
    --output-file ${ONNX_FILE} \
    --input-img ${INPUT_IMG} \
    --shape ${INPUT_SHAPE} \
    --rescale-shape ${RESCALE_SHAPE} \
    --show \
    --verify \
    --dynamic-export \
    --cfg-options \
      model.test_cfg.mode="whole"
Description of arguments:
config: The path of a model config file.--checkpoint: The path of a model checkpoint file.--output-file: The path of output ONNX model. If not specified, it will be set totmp.onnx.--input-img: The path of an input image for conversion and visualize.--shape: The height and width of input tensor to the model. If not specified, it will be set to img_scale of test_pipeline.--rescale-shape: rescale shape of output, set this value to avoid OOM, only work onslidemode.--show: Determines whether to print the architecture of the exported model. If not specified, it will be set toFalse.--verify: Determines whether to verify the correctness of an exported model. If not specified, it will be set toFalse.--dynamic-export: Determines whether to export ONNX model with dynamic input and output shapes. If not specified, it will be set toFalse.--cfg-options:Update config options.
Note
This tool is still experimental. Some customized operators are not supported for now.
Evaluate ONNX model
We provide tools/deploy_test.py to evaluate ONNX model with different backend.
Prerequisite
Install onnx and onnxruntime-gpu
pip install onnx onnxruntime-gpu
Install TensorRT following how-to-build-tensorrt-plugins-in-mmcv(optional)
Usage
python tools/deploy_test.py \
    ${CONFIG_FILE} \
    ${MODEL_FILE} \
    ${BACKEND} \
    --out ${OUTPUT_FILE} \
    --eval ${EVALUATION_METRICS} \
    --show \
    --show-dir ${SHOW_DIRECTORY} \
    --cfg-options ${CFG_OPTIONS} \
    --eval-options ${EVALUATION_OPTIONS} \
    --opacity ${OPACITY} \
Description of all arguments
config: The path of a model config file.model: The path of a converted model file.backend: Backend of the inference, options:onnxruntime,tensorrt.--out: The path of output result file in pickle format.--format-only: Format the output results without perform evaluation. It is useful when you want to format the result to a specific format and submit it to the test server. If not specified, it will be set toFalse. Note that this argument is mutually exclusive with--eval.--eval: Evaluation metrics, which depends on the dataset, e.g., “mIoU” for generic datasets, and “cityscapes” for Cityscapes. Note that this argument is mutually exclusive with--format-only.--show: Show results flag.--show-dir: Directory where painted images will be saved--cfg-options: Override some settings in the used config file, the key-value pair inxxx=yyyformat will be merged into config file.--eval-options: Custom options for evaluation, the key-value pair inxxx=yyyformat will be kwargs fordataset.evaluate()function--opacity: Opacity of painted segmentation map. In (0, 1] range.
Results and Models
| Model | Config | Dataset | Metric | PyTorch | ONNXRuntime | TensorRT-fp32 | TensorRT-fp16 |
|---|---|---|---|---|---|---|---|
| FCN | fcn_r50-d8_512x1024_40k_cityscapes.py | cityscapes | mIoU | 72.2 | 72.2 | 72.2 | 72.2 |
| PSPNet | pspnet_r50-d8_512x1024_40k_cityscapes.py | cityscapes | mIoU | 77.8 | 77.8 | 77.8 | 77.8 |
| deeplabv3 | deeplabv3_r50-d8_512x1024_40k_cityscapes.py | cityscapes | mIoU | 79.0 | 79.0 | 79.0 | 79.0 |
| deeplabv3+ | deeplabv3plus_r50-d8_512x1024_40k_cityscapes.py | cityscapes | mIoU | 79.6 | 79.5 | 79.5 | 79.5 |
| PSPNet | pspnet_r50-d8_769x769_40k_cityscapes.py | cityscapes | mIoU | 78.2 | 78.1 | ||
| deeplabv3 | deeplabv3_r50-d8_769x769_40k_cityscapes.py | cityscapes | mIoU | 78.5 | 78.3 | ||
| deeplabv3+ | deeplabv3plus_r50-d8_769x769_40k_cityscapes.py | cityscapes | mIoU | 78.9 | 78.7 |
Note
TensorRT is only available on configs with whole mode.
Convert to TorchScript (experimental)
We also provide a script to convert model to TorchScript format. You can use the pytorch C++ API LibTorch inference the trained model. The converted model could be visualized by tools like Netron. Besides, we also support comparing the output results between PyTorch and TorchScript model.
python tools/pytorch2torchscript.py \
    ${CONFIG_FILE} \
    --checkpoint ${CHECKPOINT_FILE} \
    --output-file ${ONNX_FILE}
    --shape ${INPUT_SHAPE}
    --verify \
    --show
Description of arguments:
config: The path of a pytorch model config file.--checkpoint: The path of a pytorch model checkpoint file.--output-file: The path of output TorchScript model. If not specified, it will be set totmp.pt.--input-img: The path of an input image for conversion and visualize.--shape: The height and width of input tensor to the model. If not specified, it will be set to512 512.--show: Determines whether to print the traced graph of the exported model. If not specified, it will be set toFalse.--verify: Determines whether to verify the correctness of an exported model. If not specified, it will be set toFalse.
Note
It’s only support PyTorch>=1.8.0 for now.
Note
This tool is still experimental. Some customized operators are not supported for now.
Examples:
Convert the cityscapes PSPNet pytorch model.
python tools/pytorch2torchscript.py configs/pspnet/pspnet_r50-d8_512x1024_40k_cityscapes.py \
--checkpoint checkpoints/pspnet_r50-d8_512x1024_40k_cityscapes_20200605_003338-2966598c.pth \
--output-file checkpoints/pspnet_r50-d8_512x1024_40k_cityscapes_20200605_003338-2966598c.pt \
--shape 512 1024
Convert to TensorRT (experimental)
A script to convert ONNX model to TensorRT format.
Prerequisite
install
mmcv-fullwith ONNXRuntime custom ops and TensorRT plugins follow ONNXRuntime in mmcv and TensorRT plugin in mmcv.Use pytorch2onnx to convert the model from PyTorch to ONNX.
Usage
python ${MMSEG_PATH}/tools/onnx2tensorrt.py \
    ${CFG_PATH} \
    ${ONNX_PATH} \
    --trt-file ${OUTPUT_TRT_PATH} \
    --min-shape ${MIN_SHAPE} \
    --max-shape ${MAX_SHAPE} \
    --input-img ${INPUT_IMG} \
    --show \
    --verify
Description of all arguments
config: Config file of the model.model: Path to the input ONNX model.--trt-file: Path to the output TensorRT engine.--max-shape: Maximum shape of model input.--min-shape: Minimum shape of model input.--fp16: Enable fp16 model conversion.--workspace-size: Max workspace size in GiB.--input-img: Image for visualize.--show: Enable result visualize.--dataset: Palette provider,CityscapesDatasetas default.--verify: Verify the outputs of ONNXRuntime and TensorRT.--verbose: Whether to verbose logging messages while creating TensorRT engine. Defaults to False.
Note
Only tested on whole mode.
Miscellaneous
Print the entire config
tools/print_config.py prints the whole config verbatim, expanding all its
imports.
python tools/print_config.py \
  ${CONFIG} \
  --graph \
  --cfg-options ${OPTIONS [OPTIONS...]} \
Description of arguments:
config: The path of a pytorch model config file.--graph: Determines whether to print the models graph.--cfg-options: Custom options to replace the config file.
Plot training logs
tools/analyze_logs.py plots loss/mIoU curves given a training log file. pip install seaborn first to install the dependency.
python tools/analyze_logs.py xxx.log.json [--keys ${KEYS}] [--legend ${LEGEND}] [--backend ${BACKEND}] [--style ${STYLE}] [--out ${OUT_FILE}]
Examples:
Plot the mIoU, mAcc, aAcc metrics.
python tools/analyze_logs.py log.json --keys mIoU mAcc aAcc --legend mIoU mAcc aAcc
Plot loss metric.
python tools/analyze_logs.py log.json --keys loss --legend loss
Model conversion
tools/model_converters/ provide several scripts to convert pretrain models released by other repos to MMSegmentation style.
ViT Swin MiT Transformer Models
ViT
tools/model_converters/vit2mmseg.pyconvert keys in timm pretrained vit models to MMSegmentation style.python tools/model_converters/vit2mmseg.py ${SRC} ${DST}
Swin
tools/model_converters/swin2mmseg.pyconvert keys in official pretrained swin models to MMSegmentation style.python tools/model_converters/swin2mmseg.py ${SRC} ${DST}
SegFormer
tools/model_converters/mit2mmseg.pyconvert keys in official pretrained mit models to MMSegmentation style.python tools/model_converters/mit2mmseg.py ${SRC} ${DST}
Model Serving
In order to serve an MMSegmentation model with TorchServe, you can follow the steps:
1. Convert model from MMSegmentation to TorchServe
python tools/torchserve/mmseg2torchserve.py ${CONFIG_FILE} ${CHECKPOINT_FILE} \
--output-folder ${MODEL_STORE} \
--model-name ${MODEL_NAME}
Note
${MODEL_STORE} needs to be an absolute path to a folder.
2. Build mmseg-serve docker image
docker build -t mmseg-serve:latest docker/serve/
3. Run mmseg-serve
Check the official docs for running TorchServe with docker.
In order to run in GPU, you need to install nvidia-docker. You can omit the --gpus argument in order to run in CPU.
Example:
docker run --rm \
--cpus 8 \
--gpus device=0 \
-p8080:8080 -p8081:8081 -p8082:8082 \
--mount type=bind,source=$MODEL_STORE,target=/home/model-server/model-store \
mmseg-serve:latest
Read the docs about the Inference (8080), Management (8081) and Metrics (8082) APIs
4. Test deployment
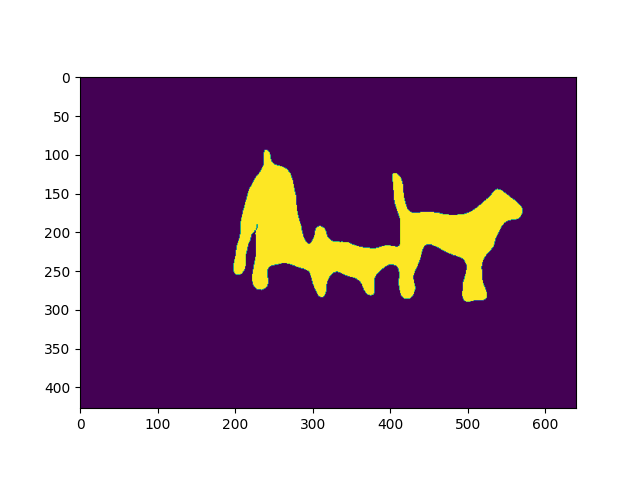
curl -O https://raw.githubusercontent.com/open-mmlab/mmsegmentation/master/resources/3dogs.jpg
curl http://127.0.0.1:8080/predictions/${MODEL_NAME} -T 3dogs.jpg -o 3dogs_mask.png
The response will be a “.png” mask.
You can visualize the output as follows:
import matplotlib.pyplot as plt
import mmcv
plt.imshow(mmcv.imread("3dogs_mask.png", "grayscale"))
plt.show()
You should see something similar to:
And you can use test_torchserve.py to compare result of torchserve and pytorch, and visualize them.
python tools/torchserve/test_torchserve.py ${IMAGE_FILE} ${CONFIG_FILE} ${CHECKPOINT_FILE} ${MODEL_NAME}
[--inference-addr ${INFERENCE_ADDR}] [--result-image ${RESULT_IMAGE}] [--device ${DEVICE}]
Example:
python tools/torchserve/test_torchserve.py \
demo/demo.png \
configs/fcn/fcn_r50-d8_512x1024_40k_cityscapes.py \
checkpoint/fcn_r50-d8_512x1024_40k_cityscapes_20200604_192608-efe53f0d.pth \
fcn
Confusion Matrix
In order to generate and plot a nxn confusion matrix where n is the number of classes, you can follow the steps:
1.Generate a prediction result in pkl format using test.py
python tools/test.py ${CONFIG_FILE} ${CHECKPOINT_FILE} [--out ${PATH_TO_RESULT_FILE}]
Note that the argument for --eval should be None so that the result file contains numpy type of prediction results. The usage for distribution test is just the same.
Example:
python tools/test.py \
configs/fcn/fcn_r50-d8_512x1024_40k_cityscapes.py \
checkpoint/fcn_r50-d8_512x1024_40k_cityscapes_20200604_192608-efe53f0d.pth \
--out result/pred_result.pkl
2. Use confusion_matrix.py to generate and plot a confusion matrix
python tools/confusion_matrix.py ${CONFIG_FILE} ${PATH_TO_RESULT_FILE} ${SAVE_DIR} --show
Description of arguments:
config: Path to the test config file.prediction_path: Path to the prediction .pkl result.save_dir: Directory where confusion matrix will be saved.--show: Enable result visualize.--color-theme: Theme of the matrix color map.--cfg_options: Custom options to replace the config file.
Example:
python tools/confusion_matrix.py \
configs/fcn/fcn_r50-d8_512x1024_40k_cityscapes.py \
result/pred_result.pkl \
result/confusion_matrix \
--show